Installing a fence windscreen can enhance the privacy, aesthetic appeal, and wind protection of your property. Whether you’re looking to add a windscreen to your garden, sports court, or construction site, this comprehensive guide will walk you through the process step-by-step. With a bit of preparation and the right tools, you can successfully install a fence windscreen and enjoy its benefits for years to come.
Materials and Tools Needed
Before starting the installation, gather the following materials and tools:
- Fence windscreen
- Zip ties or grommets
- Measuring tape
- Scissors or a utility knife
- Ladder
- Marker or chalk
- Gloves
- Safety glasses
Why Install a Fence Windscreen?
Before diving into the installation process, it’s important to understand the advantages of a fence windscreen:
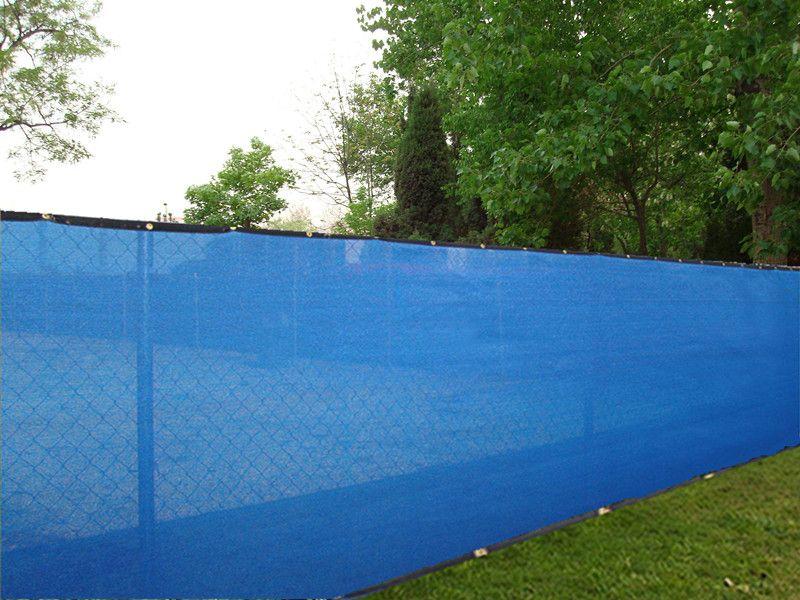
- Privacy: Fence windscreens block the view from outside, providing a private space for activities or relaxation.
- Wind Protection: They reduce wind impact, making outdoor areas more comfortable.
- Aesthetic Appeal: Available in various colors and designs, they enhance the look of your fence.
- Dust Control: Windscreens can help reduce the amount of dust and debris entering your property.
Step-by-Step Guide to Installing a Fence Windscreen
Step 1: Measure the Fence
Start by measuring the length and height of your fence to determine the amount of fence windscreen you need. Use a measuring tape to get accurate measurements. Record these measurements and double-check them to ensure accuracy. It’s crucial to measure both the horizontal and vertical dimensions to ensure that you have enough material to cover the entire fence.
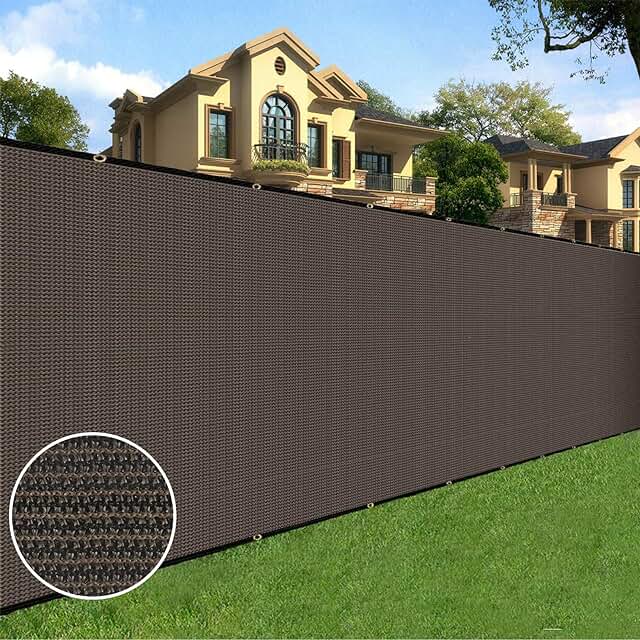
Step 2: Choose the Right Fence Windscreen
Fence windscreens come in various materials and densities. Choose one that suits your needs in terms of privacy, wind protection, and aesthetic preferences. Common materials include polyethylene and vinyl. Ensure the windscreen is UV-resistant and durable. For example, a higher-density windscreen will offer more privacy and wind protection but may cost more and be slightly more challenging to install.
Step 3: Prepare the Fence
Clean the fence thoroughly to remove any dirt or debris. This will help the windscreen adhere better and last longer. If there are any rough spots or protruding nails, smooth them out to avoid damaging the windscreen. This step is essential because a clean and smooth surface will ensure a better fit and longevity for your windscreen.
Step 4: Cut the Fence Windscreen to Size
Using the measurements taken earlier, cut the fence windscreen to the appropriate size. Lay the windscreen on a flat surface and use scissors or a utility knife to make precise cuts. Remember to leave a few extra inches on each side to allow for adjustments during installation. Cutting the windscreen accurately will make the installation process smoother and ensure a neat appearance.
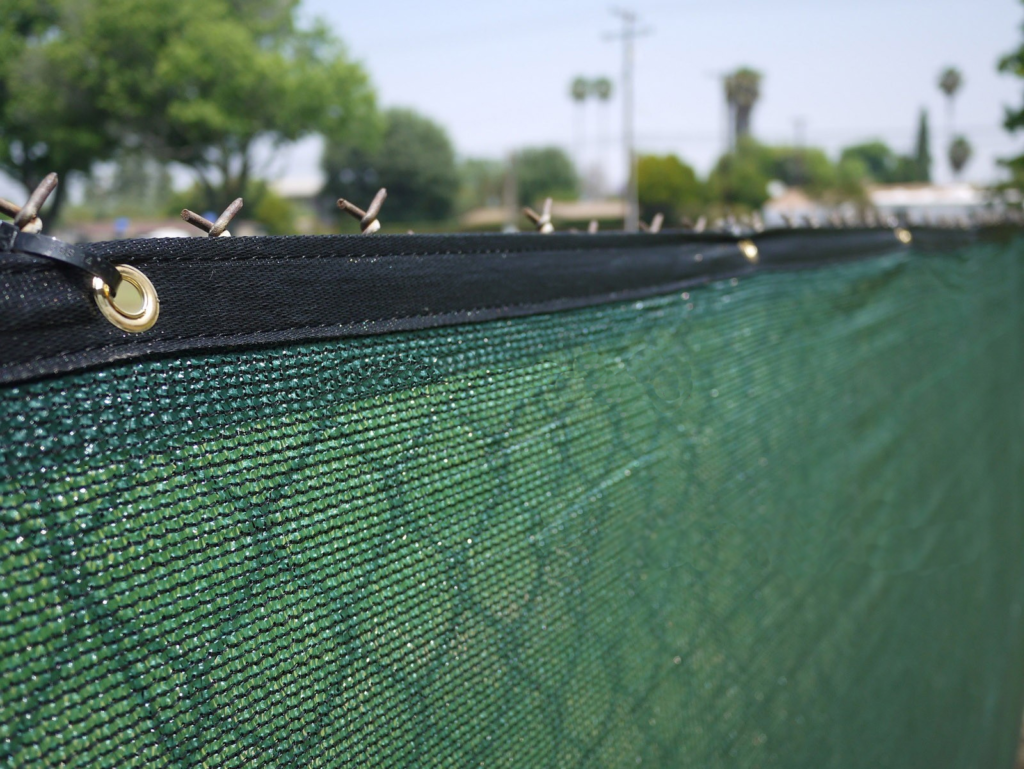
Step 5: Attach the Windscreen
Begin attaching the fence windscreen at one end of the fence. Use zip ties or grommets to secure it. If using zip ties, thread them through the grommets or pre-punched holes in the windscreen and loop them around the fence posts. Pull the zip ties tight to secure the windscreen in place. Start from the top and work your way down to ensure that the windscreen is evenly stretched and aligned.
Step 6: Continue Securing the Windscreen
Work your way along the fence, attaching the windscreen at regular intervals. Make sure the windscreen is taut and free of wrinkles or sagging. Use additional zip ties or grommets as needed to ensure a secure fit. It’s important to maintain consistent tension to avoid any flapping or movement caused by wind.
Step 7: Trim Excess Material
Once the windscreen is fully attached, use scissors or a utility knife to trim any excess material. This will give your fence a neat and finished appearance. Be careful to trim closely to the fasteners to maintain a clean look without compromising the windscreen’s attachment.
Step 8: Inspect and Adjust
Inspect the entire length of the windscreen to ensure it is securely attached and free of any gaps or loose sections. Make any necessary adjustments to achieve a smooth and even look. Ensuring a proper fit and appearance not only improves functionality but also enhances the visual appeal of your fence.
Maintaining Your Fence Windscreen
To ensure the longevity and effectiveness of your fence windscreen, follow these maintenance tips:
- Regular Cleaning: Clean the windscreen periodically with a mild soap and water solution to remove dirt and debris. Regular cleaning prevents buildup that can degrade the material over time.
- Inspect for Damage: Check for any tears, holes, or loose sections and repair them promptly. Early detection of damage can prevent more extensive issues later.
- Tighten Zip Ties: Over time, zip ties may loosen. Inspect and tighten them as needed to maintain a secure fit. Ensuring that all fasteners are tight will keep the windscreen effective and looking good.
Common Mistakes to Avoid
- Incorrect Measurements: Double-check measurements before cutting the windscreen to avoid wastage. Accurate measurements are crucial for a proper fit.
- Using Weak Fasteners: Ensure zip ties or grommets are strong enough to withstand wind and weather conditions. Weak fasteners can result in the windscreen coming loose or being damaged.
- Ignoring Maintenance: Regular maintenance is crucial for the longevity of your windscreen. Neglecting maintenance can lead to premature wear and tear.
Additional Tips for a Successful Installation
- Work in Pairs: If possible, work with a partner. One person can hold the windscreen in place while the other secures it.
- Check Weather Conditions: Install the windscreen on a calm day to avoid difficulties caused by wind.
- Use Quality Materials: Investing in high-quality windscreens and fasteners will pay off in durability and appearance.
- Follow Manufacturer Instructions: Always follow the specific instructions provided by the windscreen manufacturer for the best results.
Read it also:- Benefits of Adding a Privacy Fence Windscreen to Your Yard
FAQs about Fence Windscreen Installation
Q: How long does it take to install a fence windscreen?
A: The installation time depends on the length of the fence and the number of people working on it. Typically, it can take a few hours to a day.
Q: Can I install a fence windscreen by myself?
A: Yes, but having an extra pair of hands can make the process easier and faster.
Q: How do I choose the right fence windscreen?
A: Consider factors like privacy needs, wind protection, and aesthetic preferences. Opt for durable, UV-resistant materials.
Q: How often should I clean my fence windscreen?
A: Cleaning it every few months is recommended, but it may vary depending on your environment and weather conditions.
Q: What should I do if my windscreen gets damaged?
A: Repair minor tears with patch kits available from most suppliers. For significant damage, you may need to replace the affected section.
Q: Can a fence windscreen withstand severe weather conditions?
A: High-quality windscreens are designed to withstand harsh weather conditions, but it’s important to ensure they are securely fastened and properly maintained.
Q: Is a fence windscreen suitable for all types of fences?
A: Fence windscreens are versatile and can be installed on most types of fences, including chain-link, wooden, and metal fences.
10 Tips to Choose the Best Fence Windscreen
Contact us
If you have any questions or need assistance with installing your fence windscreen, Nets Depot Inc. is here to help. Our team of experts is dedicate to providing you with the best advice and highest quality products to meet all your fencing needs. Whether you’re unsure about the installation process, need help selecting the right product, or have any other inquiries, don’t hesitate to reach out. We pride ourselves on offering exceptional customer service and ensuring that you have a seamless experience from start to finish. Give us a call at (305) 215-5579, and let us assist you in making your fencing project a success.